Vegetable gardens often get overlooked when it comes to looking aesthetically appealing, with more attention being placed on more ornamental gardens.
This makes sense, as vegetable gardens have a more utilitarian purpose – to provide us with fresh, healthy produce.
Whereas ornamental gardens are designed to look pretty, so it’s natural that we put all our creative energy into making these gardens look beautiful, while letting vegetable gardens fall to the wayside.
However, creating a stunning vegetable garden can create a more cohesive look and make those delicious veggies, fruits, and herbs even more appealing!
But where do you begin with creating a stunning vegetable garden? Well, that’s what we’ll be exploring in our article today!
But first, we want to welcome all new readers joining us from insidetheurbangreen.org. We have recently acquired the site and hope we can pique your interest with our many articles about all things bright and beautiful!
Create A Color Scheme For Your Garden
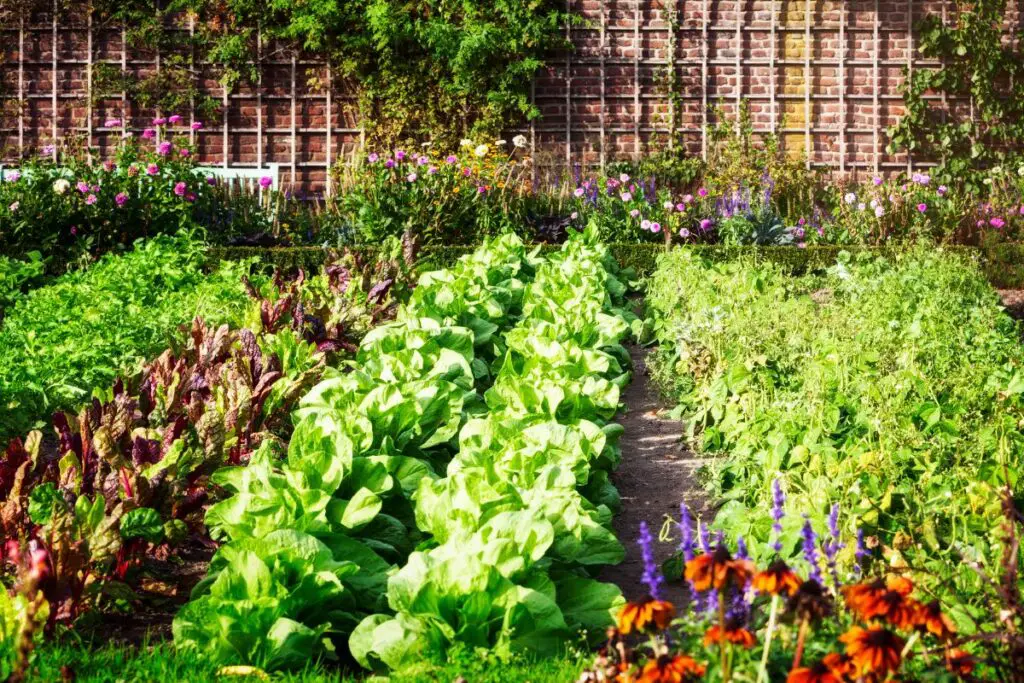
Combining ornamental gardening and edible gardening together definitely isn’t a new thing, and has been a common practice in France for centuries.
Their ‘potagers’ (vegetable gardens) are bursting with beautiful flowers, as well as delicious fruits, herbs, and vegetables.
One of the simplest ways to create a gorgeous vegetable garden is to combine flowering ornamentals in your garden, and to also think about color.
When deciding what plants you want to include in your vegetable garden, we recommend going for a larger range of textures and colors, and covering the ground with plants that are both colorful and delicious, such as blue-green cabbage, golden sage, and purple basil.
We also recommend planting colorful sections in blocks so you get a stunning, patchwork quilt look in your garden.
Plant Your Veggies Strategically
From running beans to raised beds, these four easy design tips will help you turn your vegetable garden into a gorgeous vegetable garden.
Arrange Bold Color Blocks
Lush, bright foliage is essential for a vegetable garden, and you can achieve this by planting colorful sections of fruits, herbs, vegetables, and flowers side by side to create a dramatic, dynamic display.
Plant Cozy Beds
Instead of planting your produce in straight rows, why not create snug planting patterns that will give you expansive beds of appealing edibles?
Create Smooth Edges
Clean pathways and edges will help you better define the space, and complementary materials – such as brick or wood – and colors will help tie your home aesthetic and garden aesthetic together.
Create Beautiful Boundaries
Just like color was common in traditional vegetable gardens, enclosures were also important elements. For example, medieval gardens usually had simple wattle fences to create simple boundaries within the garden.
Also, cloister gardens had enclosures to create the idea that vegetable gardens were special, peaceful, and beautiful places.
Taking tips from our ancestors, you can transform your vegetable garden into your own outdoor sanctuary. Enclosures also help to make your garden feel more intimate and private, while also helping to better organize your garden.
The best enclosures should complement their surroundings. For example, a wrought-iron fence would suit an urban, front-yard kitchen garden, while picket fences compliment most styles of houses.
If you would like to build a stone wall, we recommend using local materials – such as granite or limestone – for a sturdy, timeless vegetable garden enclosure.
Really, the options are limitless when it comes to creating boundaries for your vegetable garden. Espaliered pear trees or apple trees can even be trained to grow on wire fences or a brick wall for a transparent effect.
A row of currants or a boxwood hedge would also make a great living-fence option.
Meanwhile, ornamental grasses, or tall annuals or perennials are great for creating boundaries with a seasonal twist. However, make sure to separate perennials and annuals to make amending and tilling your annual beds easier.
Primp Pathways And Bed Edges
If you like to plant in raised beds, soil-retaining or edging materials are a crucial element for ensuring your soil stays in place.
But if you don’t plant your produce in raised beds, edging is still an amazing way to make your ground-level plantings look polished. It helps to indicate the borders of the beds, and it gives your garden a neat, crisp appearance.
You can construct edges from brick, cobbles, granite, steel, or wood. You can also get creative with edges made of rustic logs to make your garden look more quaint and whimsical.
Primped pathways, meanwhile, are another feature that can make your garden even more beautiful. Laying down crushed-gravel or wood chip paths can revitalize your garden and make your garden a more welcoming place for visitors.
Brick and granite are not only ideal for edges but can also spruce up your pathways! However, you should ensure your passageways are able to fit a wheelbarrow.
Whatever pathway and edging materials you go for, you should ensure they match your house and the garden as a whole. Pavers or stones are great for more formal, traditional architecture, but wood is great for a more rustic house.
Again, color is an important factor here, and you should go for colors that complement your home.
Plant Your Veggies Close Together

If we’re feeling a little impatient, we may be tempted to place our plants closely for an immediate impact. However, planting beds are the perfect opportunity to plant your veggies closer than you normally would.
We recommend planting your veggies so the tops of the leaves will brush against the next plant when mature.
This method uses the plants as living mulch to get rid of weeds. Plus, it also makes the garden look more beautiful and lush, as the color of the plants – rather than the soil – will be visible.
As well as tightly planting your vegetables, why not change your planting pattern too? Rather than lining up your produce in neat rows, plant the seeds in a triangle so the beds burst with color.
Beets, carrots, garlic, lettuce, leeks, and onions are examples of plants that can be planted closer together. As they mature, thin out every other plant to eat and leave the rest to grow to full maturity.
Of course, the more of the edibles you eat, the more gaps there will be in your vegetable garden. To fill these gaps, plant crops that will grow quickly such as basil and radishes. Your garden will be lush and full again soon enough!
Simple Veggies And Herbs To Get You Started
Before we get into the simple herbs and vegetables to get you started, let’s discuss some tips on how to choose vegetables for your garden.
Think About What Your Family Likes To Eat
So for example, if your family doesn’t like brussels sprouts, there is no point planting them! But if your family likes green beans, then try your hand at growing a hearty crop.
You should also consider how many vegetables your family is likely to eat. Make sure not to over-plant, as it will be exhausting to take care of a ton of plants that may just go to waste.
But of course, you can always give away excess vegetables to extended family, friends, or your local soup kitchen.
Think About What’s Available At Your Grocery Store
Grow vegetables that you like but are not available at your grocery store, and vegetables that taste far better when they’re homegrown (like tomatoes and lettuce).
Plus, homegrown herbs are also a lot cheaper to grow yourself than buying them from the grocery store.
Be Ready To Take Care Of Your Plants During The Growing Season
When heading for a summer vacation, ask a neighbor, friend or family member to take care of the crops while you’re away.
Or, you can just decide to grow cool-season crops when you’re more likely to be around, such as kale, lettuce, peas, and root vegetables that thrive in early fall and late spring.
Use High-Quality Seeds
While seed packets are cheaper than seeds for individual plants, if the seeds fail to germinate then that is a waste of money and time. But spending a couple extra cents in the spring will give you higher yields at harvest-time.
Now let’s get onto simple veggies and herbs to get you started!
Italian Parsley
This is a flat-leaf parsley that will remain a rich green shade all summer. It’s a tasty variety of parsley that can be used in practically every meal. Plus, it holds up well to shade.
Nasturtiums
These annual edibles are easy to grow and make ideal edging plants. Plus, they come in a variety of colors from creamy white, to orange and scarlet.
Scarlet Runner Bean
This is a beautiful, climbing plant that covers trellises with stunning, edible red flowers, leafy green vines, and delicious beans. Plus, it will draw hummingbirds to your gardens!
Tips For Maintaining Your Vegetable Garden

Be Careful With Watering
One inch of water a week – including any natural rain – is enough for most vegetable plants.
The most productive and efficient irrigation method is to use drip lines and soaker hoses, as these deliver water gradually, and target water accurately giving the roots time to soak up the moisture and sufficiently hydrate the soil without soaking the foliage.
Leaving foliage wet for long periods of time can encourage disease. Automatic timers are an amazing way to prevent disease while reducing effort on your part.
Use Mulch
We recommend adding three inches of organic mulch around your plants, and even the irrigation lines too if you can. Mulch will insulate the soil and help to keep it warmer in winter and cooler in summer.
Mulch also helps to keep the moisture in, prevents weeds from growing, and protests plants against disease. Plus, mulch looks amazing in your garden!
Knowing where your mulch comes from is important too, particularly in a vegetable garden.
Some mulch contains a lot of dangerous chemicals, and while there isn’t a certification for bulk mulch to make sure you’re buying good quality mulch, the Mulch and Soil Council is a non-profit organization that certifies soils and mulches that don’t contain dangerous ingredients.
Be Patient
While pests are to be expected in your vegetable garden, being patient will usually yield the best results, and sometimes it’s worth letting nature take care of the issue.
It’s hard to forget that only around 3% of the bugs in your garden are harmful. As long as you follow good practices, and take suitable measures to encourage the growth of healthy plants, your garden will be able to better withstand pests!
But if you need to use insecticides, use them responsibly. Responsible use of insecticides means using them in the evening and only when necessary.
You shouldn’t use pesticides in the morning when useful insects and pollinators are active, otherwise you’ll hurt them too.
We also recommend avoiding chemicals in a garden where you’re growing edibles, as this will have an impact on the health of those who eat your produce. Rather, concentrate on growing healthy plants in sunny conditions and with great soil.
Pesticides – whether synthetic, natural, or organic – are non-selective so they will kill insects that are great for your garden too.
Be Careful Not To Overfertilize
Excessive fertilizer – especially nitrogen – may encourage lots of lush green growth, while hindering the growth of fruit and resulting in a smaller harvest. Too much fertilizer can also hurt your soil and plants.
Rather, we recommend using as much organic compost as you can, ideally around 20% of the complete soil makeup.
Add it to the remainder of the soil to ensure your plants are provided with the nutrients they need to succeed.
Final Thoughts
We hope our article has given you all the advice you need to not only create a vegetable garden that is as beautiful as it is bountiful, but also how to maintain your vegetable garden so you can grow reliable, safe, and healthy produce that you can enjoy for years to come.
